Adaptiv | Edge E-40 Install Guide
Adaptiv | Edge E-40 Install Guide
Thank you for choosing Adaptiv Networks. This Install Guide outlines the step-by-step instructions to enable a rapid and frictionless install of the E-40 devices running on OS 8.x and greater.
Package Components
 |
The following components are shipped in the package containing the E-40. If you note any of the below-listed components missing or damaged, please contact support@adaptiv-networks.com. - Adaptiv | Edge E-40 x 1
- Power Adapter x 1
- Power Cord x 1
- Console Cable x 1
|
Safety
All standard electronic safety instructions apply.
 |
- Verify that the power supply is safe and does not exceed the power adapter's specified input capacity for the device. To avoid fires and device damage, only use approved and standard cables and adapters.
- To avoid the hazard of electric shock while plugging the device into the power supply, verify that the power socket is not damaged.
- Disconnect the power while removing or making a connection.
- To clean the device, first, disconnect it from the power supply. Clean with a slightly damp cloth and avoid spraying with liquid or detergents.
- Place the device in a controlled environment with monitored levels of temperature and humidity.
- Place the unit on rack or on top of shelf in a ventilated room, the E-40 is passive cooled: the device is designed as a fanless system with an aluminum enclosure, which helps to dissipate the heat to the external environment quickly and efficiently. The supported thermal operating environment is up to 40°C (100F) and the E-40 with high loads can run as hot as 60°C (140F). We advise that it should be placed on a flat solid surface in the open and not in non-ventilated enclosure. Refrain from putting any objects on top of the E-40.
- If you observe that the device is damaged or not operating in the described manner, please reach out to support@adaptiv-networks.com.
|
Installing E-40
Before proceeding with the installation, locate the circuits that will be connected to the E-40 and test internet reachability and run speed tests by direct connection to a laptop or desktop. Record the speed test values on each circuit for download/upload. See Installation Best Practices.
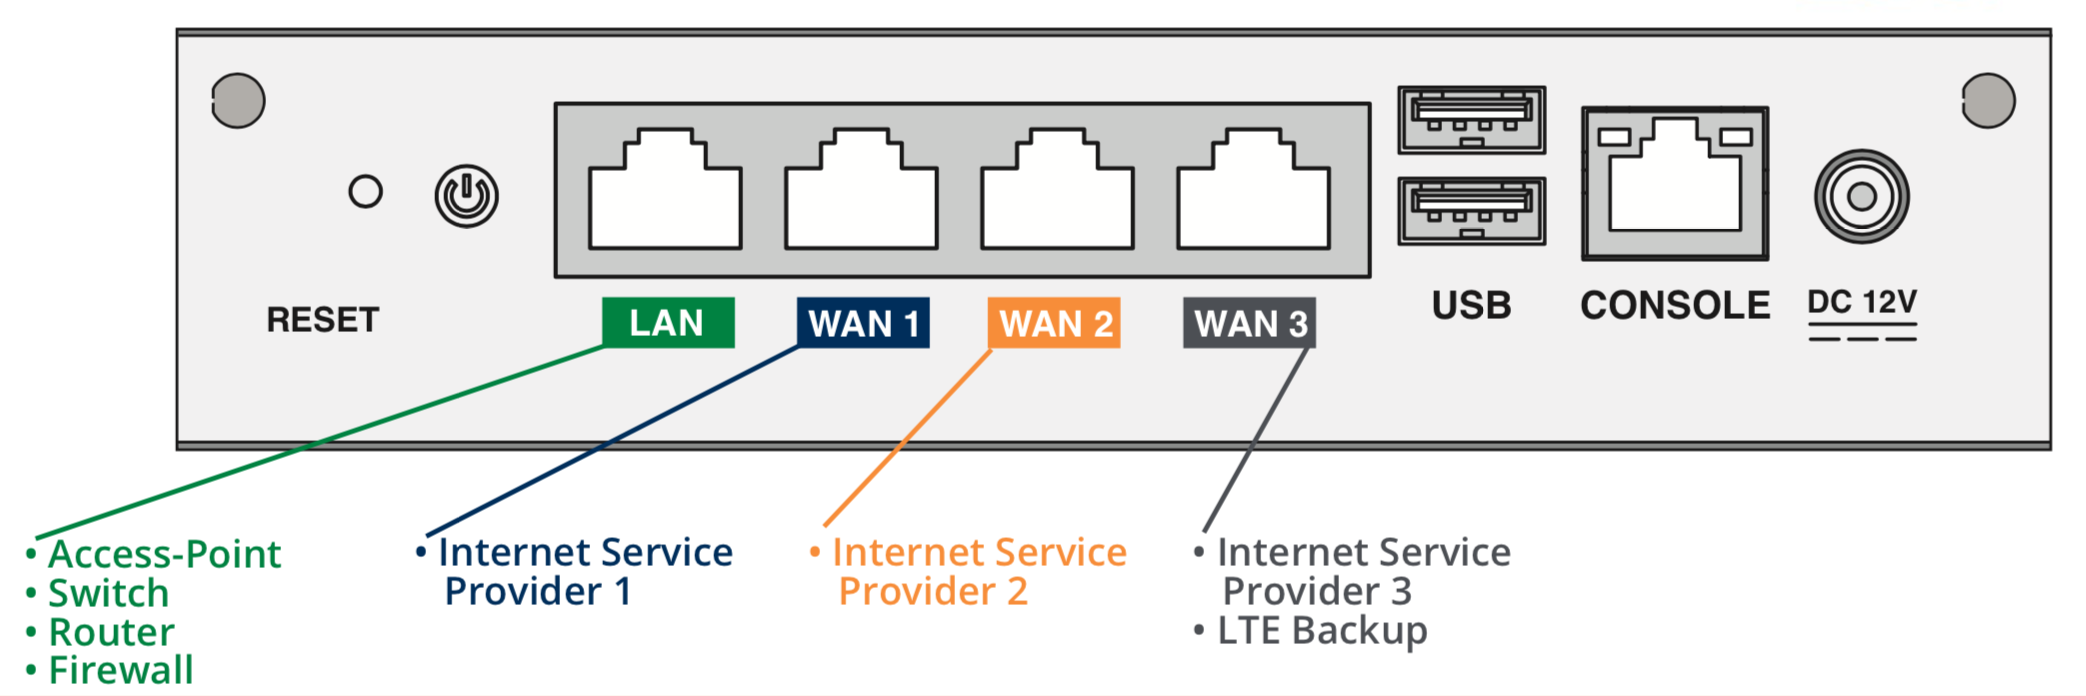
- Connect your primary Internet circuit to the WAN1 Port.
- Connect the backup and subsequent Internet circuits to the remaining available WAN ports.
- Connect a USB dongle or the SIM for in-built modem if available.
- Connect either your firewall, router, or switch to the LAN port.
- Power on the device and complete device installation by following the provisioning steps captured here.
Post-installation Activities
- After completing the installation, login to Adaptiv Cloud Orchestrator to verify that the site is online.
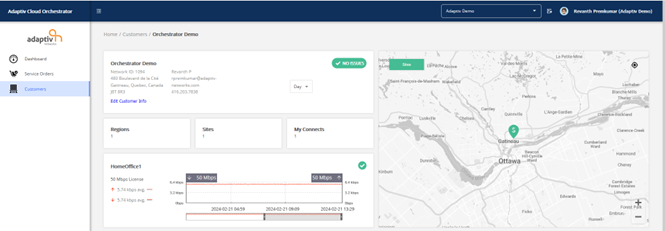
- In the orchestrator, on the customer dashboard, check the customer and site status as shown below. A successful installation and deployment is indicated by "No Issues" message in the customer information section and a green checkmark in the site section.
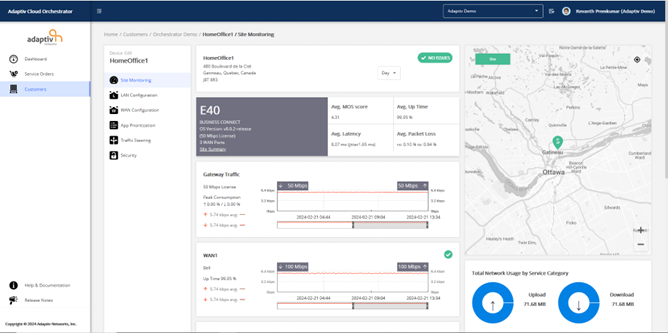
- Click the site name to detailed information about the site such as status of individual WAN connections, QoE score, and network usage.
Adaptiv | Edge E-40 Specifications
Adaptiv | Edge E-40 is a Desktop Network Appliance with a Front and Back Panel.
|
Front Panel |
The Front Panel constitutes of the following components (Left to Right View). 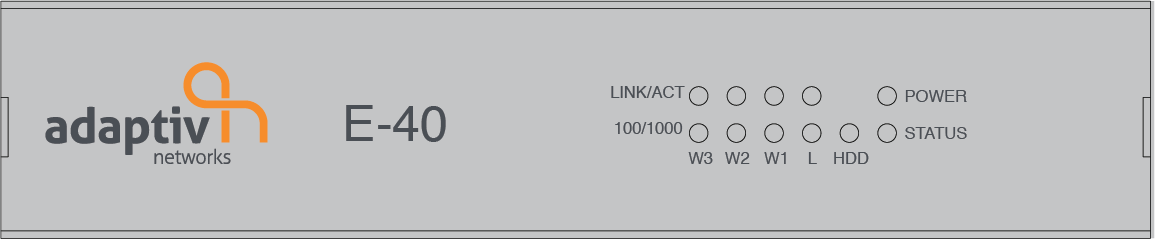
- Eight Connectivity LED indicators stacked in two rows
- One Storage Active LED indicator
- One Power LED indicator
- One Status LED indicator
Front Panel LED Key (Left to Right View) | LED | Description | W1, W2, W3, and W4 (WAN Ports)
| Link/ACT: - OFF (No Color) – No network connection
- ON (Green) – Active link
- BLINKING (Green) – Active link carrying data
| 100/1000: - OFF (No Color) – No network connection
- ON (Green) – 100Mbps Port connected speed
- ON (Orange) – 1000Mbps Port connected speed
| | L (LAN Port) | Link/Act: - OFF (No Color) – No network connection
- ON (Green) – Active link
- BLINKING (Green) – Active link passing data
| 100/1000: - OFF (No Color) – No network connection
- ON (Green) – 100Mbps Port connected speed
- ON (Orange) – 1000Mbps Port connected speed
| | Power | - OFF (No Color) – Device turned off
- ON (Green) – Device turned on
| | HDD | - OFF (No Color) – No HDD detected
- ON (Green) – HDD detected
- BLINKING (Green) – HDD I/O Activity
| | Status | - OFF (No Color) - No power detected
- ON (Green) - Device connected to power but in a power-off state
|
|
|
Back Panel |
The Back Panel constitutes of the following components (Left to Right View). 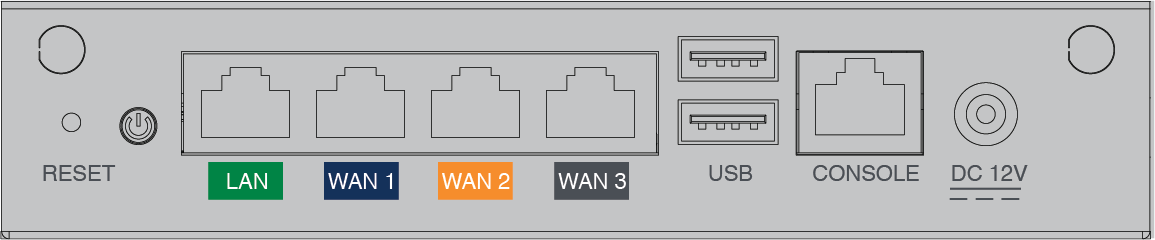
- Power button
- Four RJ-45 Network Ports
- Two 3.0 USB Ports
- One RJ-45 Console Cable Port
- One 12V DC Power Connector
Back Panel LED Key (Left to Right View) | Port | Description | | LAN | - Access-Point
- Switch
- Router
- Firewall
| | WAN | - WAN 1– Internet Service Provider Link 1
- WAN 2 – Internet Service Provider Link 2
- WAN 3 – Internet Service Provider Link 3/ LTE Backup
| | USB | | | CONSOLE | | | DC 12V | |
|
TERMS OF USE | ANTI SPAM | PRIVACY POLICY | USER LICENSE AGREEMENT | PATENTS